How to delete locked or unmovable files - Remove Access denided error in Windows

If you use your computer for normal daily needs more than only use facebook or watch youtube videos, you probably have come across situations were you can’t delete one or more files using the typical method. When you try to delete a file you get “Access Denied! Cannot delete the file. File is being used by any other program” error.
This happens because of virus programs, Registry errors or the files is opened by any software. but still you can delete it with some basic free softwares. in this post i will introduce you 2 small utilities than can help you to delete those locked content from your computer.

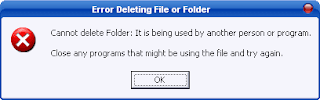
 First lets see the main error messages will occur when you try to delete locked files.

  • Cannot delete file: Access is denied
  • The file is in use by another program or user
  • Cannot read destination root or parameters
  • Make sure the disk is not full or write-protected and that the file is not currently in use

First lets take a look at the most popular tool "Unlocker 1.9.1"

unlocker is a very popular freeware. it can remove all connections to a file or folder just from few clicks. you don't have to go through task manager process tab or antivirus firewalls to close the file tasks running with those files or folders.

New added features in Unlocker 1.9.1 for 32 and 64 bit - 4/12/2011

- Improved UI: Progress bar when deleting large folders
- Improved UI: Fixed all references to previous website in UI
- Fixed Bug: Fix crash which happened with deep paths in old versions
- Fixed Bug: Fixed update check to match new Unlocker website (http://unlocker.emptyloop.com)
- Fixed Installer: Fixed x64 installer for references to non existing assistant
- Promotional feature: Fully optional Bing or Quickstores toolbar depending on location. 

How to use unlocker 

1)  Download and install unlocker 1.9.1 from here


2)  Simply right-click the folder or the file that you want to delete, and select Unlocker from the context menu.


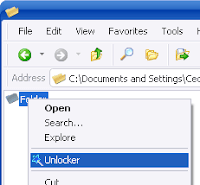
3)  If the folder or file is locked, a window listing of lockers will appear. Simply click Unlock All and you are done!

 .

Serial Keys - Most asked - Free Serials for Softwares

Want to run your favorite softwares as premium user?
Having problems when installing softwares?
Doesn't like trial version anymore?

Then here is the solution. I'll upload most asked Serial Keys for latest and often used softwares. You can request serials for your softwars also. but for few weeks we have closed our comments and chat section. we will put it again on next week. Book mark this page often to get new keys and Premium user codes for softwares. First of all I'll put few out web site visitor requests here. I'll update this page every time when i get useful Serial keys. Please click facebook like button at the top of this post. and share with your friends.

AVG Internet Security 2011 :-
8MEH-R6BFE-HWUHF-DPNDA-VFUWX-2EMBR-ACED
8MEH-RXYFD-JUV72-8922R-FTBZ6-QEMBR-ACED
8MEH-RFR8J-PTS8Q-92ATA-ORC6Q-JEMBR-ACED
8MEH-RS47Y-82HT8-GONVA-BCCCZ-DEMBR-ACED
8MEH-RXYFD-JUV72-8922R-FTDO8-QEMBR-ACED
8MEH-RGM33-K474L-6FGRR-8QEFN-UEMBR-ACED

Avast pro 6 - Full version ( You won't find this anyware )


W2334862R9900D1199-C00CBZYP
W83228769R9900F3599-7NL8USBS
S70862951R9900W0148-0LWNMN4P
S87387840R9900R8065-USYPSAVX
C06346240R9900T6999-KP18JKXJ
W06206137R9900C2147-U8528X68
S52581139H9900Z1393-CLL4M37N
W01575876H9900W2447-59SRR6NM
S10696481H9900X6760-AAYDFUY2
W73347370H9900A3198-FF8SWT68
W25175209H9900B4045-HW2SB742
S17525811H9900H1968-TYAA43RJ

Microsoft Office 2010 Professional Plus x64_x86 Activator


Adobe CS5 Master Suite


1325-1118-5864-4422-1094-1166
1325-1558-5864-4422-1094-1126
1325-1958-5864-4422-1094-1178

Trick your Friends by showing your computer as a CORE i3 ,i5 ,i7 or more

This is a simple trick that we use to change the processor name in system properties window. You can change this by using some softwares also. but this is the easiest way. Just simple registry editing only. You don't have to worry about this. because this is 100% safe.
You can change your processor name and speed details as you wish. You can show your Pentium 1 pc as CORE i7 :D

Now lets see how to do it.


* Go to Start menu and click run (Earlier windows versions) type REGEDIT and click ok
     OR
   Type REGEDIT in start menu search box.

You can get the RUN box by pressing Windows key + R

* Now you will see the Registry editor window.

go to
HKEY_LOCAL_MACHINE>HARDWARE>DISCRIPTION>SYSTEM>CENTRAL PROCESSOR
You might see few sub categories as 0,1,2 if your processor has multi threads. just change the value inside processor 0

Now on the right side you will see a option in the list named PROCESSOR NAME AND STRING


Right click on it and select MODIFY

Now change the value as you wish. you can get more processor details from this site if you want to add a real processor name or you can type whatever you want. now right click my computer and go to properties or check your processor with any software. it will show the name and values you entered. Now show it to your friends. Watch the picture below. My processor has 8 GB cache memery xD


Simple tool to split and join files - HJSplitter

Hjsplitter is a very simple tool that can Split files to parts and reassemble them. you don't have to install this. Just download and run. Also it is only a few kilobytes in size. so no need bigger compression softwares of splitters for your basic needs. Advantage of this software is you can use this Linux and other operating system platforms also.
This tool works great with every windows version from windows 95 to Windows 7. is there any compatibility issues? :)

Read more to get the download links.

Why should one want to split and recombine files? For instance, think of a file of 50 Mb, and try to send it to a friend, post it in a newsgroup or upload it to a Website or FTP server. It is usually easier to send/receive, upload/download smaller parts than handle the entire file in one go.

HJSplit can also be useful for backups. A file of e.g. 10 gigabytes in size can be split into smaller parts which then can be burned to CD's, DVDs, copied to USB sticks or uploaded to an online backup service. 

HJSplit for Windows and Linux support file sizes of over 100 Gigabytes, MD5 checksums, file-compare, "run without install" and both editions are fully portable. 

Most of times your Free movie and software downloads comes in *.001 file format. so you can join those files with HJsplitter to get the full file. 

When joining files the only thing you have to do is
  1. Copy all file parts to one foler
  2. open HJSplitter
  3.  Click join
  4. Browse and open *.001 file
Now HJsplitter  will find other files automatically and make the full file.

Download HJSplitter

Download Firefox 6 Portable version

Mozilla has announced it's latest Firefox product version. Firefox 6 comes with lots of improvements and support tools. You can Read more about Firefox 6 from here..  Most people doesnt like to change to fast for new web browsers. Thats why we posted this page for you. You can download the portable version of Firefox 6 from this page. You don't have to install it. just download and run. If you like it You can download the full version from here..

More details and Download links are posted below in this post.

Many of us like portable software because they don't need to install and we can carry them in our USB drives.
Many times we need portable version of a software to test it before installing.


So if you don't want to install Mozilla Firefox browser in your system but still want to try it, you can download the portable version and can directly run it without any installation.

You can also store it in your USB thumb drive and can carry it with you to use it anywhere you want.

Download Firefox Portable Version

If you like Firefox 6 features you can download the full version from here.

Mozilla Firefox 6 Released Download Full and Portable versions from here

Mozilla has announced its newer version of Firefox. Firefox 6 comes with lots of improvements and support facilities. Firefox is available in over 70 languages, thanks to the contributions from Mozilla community members around the world.

In this post i have updated all new features in Firefox 6 and its download link. If you are not sure about installing the newer version, you can download and check it's portable version too. I have posted both links here for you to download.


Following are some important changes in this version:
  • The address bar now highlights the domain of the website you're visiting
  • Streamlined the look of the site identity block
  • Added support for the latest draft version of WebSockets with a prefixed API
  • Added support for EventSource / server-sent events
  • Added support for window.matchMedia
  • Added Scratchpad, an interactive JavaScript prototyping environment
  • Added a new Web Developer menu item and moved development-related items into it
  • Improved usability of the Web Console
  • Improved the discoverability of Firefox Sync
  • Reduced browser startup time when using Panorama
  • Fixed several stability issues
  • Fixed several security issues


Read more about Firefox 6 and download it from official Mozilla web page for Firefox 6

If you don't like to install it directly, You can download and try Firefox 6 portable version

Guide to fix the “Task Manager has been Disabled by Your Administrator” Error

Have you ever faced this problem? That's a very common problem for Windows users. Many times when you try to open Task Manager, you find that "Task Manager" option has been grayed out or when you try to run it by typing "taskmgr" in RUN dialog box, Windows shows Task Manager has been disabled by your administrator. There are 2 major reasons for this problem
  • Your system has been infected with virus and it has disabled the Task Manager.  
  • Your system administrator applied the restriction using Registry Editor or Group Policy Editor.
Now you are going to learn the easiest way to fix this problem
If you are already the Administrator of the system, then your system is most probably infected. You should Check your system with a good antivirus and spyware or malware program. go to below link and download suitable antivirus or firewall with activator or crack files.


After removing the virus or any other spyware that harmed your system, still you will not be able to access task manager. so now you have to enable it on the windows registry. it will take few steps. lets see how to remove task manager disabled message step by step.

Type "regedit" in RUN dialog box ( Windows key + R ) or Start menu Search box and press Enter. It will open Registry Editor.

Now go to following keys one by one:
HKEY_CURRENT_USER\Software\Microsoft\Windows\CurrentVersion\Policies\System
HKEY_LOCAL_MACHINE\Software\Microsoft\Windows\CurrentVersion\Policies\System
HKEY_USERS\.default\Software\Microsoft\Windows\CurrentVersion\Policies\System
and look for a DWORD value "DisableTaskMgr" in right-side pane as in the picture below. If you find it, delete it. After that your task manager will work as usual.


If you are new to registry editing or afraid to do testings like this, you can use ready-made registry script to do the task automatically. Download following ZIP file coded by trick hunters to get your task manager problem fixed.

Now extract the downloaded zip file and run the .REG file. it will ask for the confirmation. Accept it. it will fix your task manager problem.

Fix USB drive errors in Windows 7

Have problems while copy files to a pen drive or external hard disk? when you move files to a removable device? Windows 7 has some issues with USB data transferring. Copy progress stuck at some places or it doesn't show the real remaining time. some times its not responding to us. that's why Microsoft officially announced this update to fix those USB data transferring issues.
This new update allows you to increase maximum transfer size of USB storage devices in Windows which will help in improving performance of USB devices. After you install this update, you can increase the maximum transfer size from 64 kilobytes (KB) to 2 megabytes (MB) to improve USB performance.

You just need to follow these simple steps to improve USB storage devices performance in Windows 7:

1. First download and install the windows 7update file using following link:


2. Now type regedit in start menu search box. or press Windows key + R and get the run box. now type regedit in there. now it will open the registry editor.

3. Now go to following key:
HKEY_LOCAL_MACHINE\SYSTEM\CurrentControlSet\Control\usbstor

4. Under usbstor key, create a new key VVVVPPPP so the final path would be:
HKEY_LOCAL_MACHINE\SYSTEM\CurrentControlSet\Control\usbstor\VVVVPPPP

5. Now in right-side pane, create a new DWORD value MaximumTransferLength

6. Double-click on this new DWORD value, set Base to Decimal and set Value data to 2097120


That's it. Restart your system and get ready to enjoy improved USB storage devices performance in Windows 7 and Server 2008 R2.

PS: If you want a ready-made registry script to do the task automatically, download following ZIP file, extract it and run the extracted REG file. It'll ask for confirmation, accept it:

Download Registry Script 

How to type Sinhala and tamil without Fonts


Today you are going to learn how to use Unicode fonts in windows. You already know if we have fonts, we can type in any language or any style of text. but the problem is if others haven't got those fonts, they cant read anything you typed. so you have to send fonts files along with your document. that is ok. but problem is when you type in a chat ( Skype , Facebook, Yahoo etc. ) or Web forums and comments. You have to give them a link to download your font files. its not going to work :P  thats why we use Unicode letter format. Unicode letters are embedded to windows. so you can watch them in any computer without sharing fonts or softwares. You can type anywhere using Unicode.


There are few application softwares you can use to type Unicode. but in this post im going to show you how to type unicode without third party tools. You can type Sinhala and Tamil Using this. First visit this link. This is a free service by University of colombo.


You can see the wijesekara sinhala keyboard layout by visiting last link of that page, as shown in number 3 in that picture. Most professional Data entry and typesetters use This format. It is very easy when you practiced it well. But it takes some time. If you have type only a little phase you can visit number 2 link. It gives you a keys collection. you can easily get the word that you wanted.

Most important Site is the link 1. Font encoding converters for Sinhala & Tamil   


Everyone knows Singlish and Tanglish. that means we type Sinhala or Tamil word pronunciation in English letters. Most people use it when sending sms and online chat. we can get Sinhala or Tamil words by typing Just the pronunciation. Use the last links block to type Singlish or Tanglish. 


When you click on Singlish or Tanglish as shown in the picture. You will get a form like this.
When you type English pronunciation in the first box You will get the Unicode letters in the second box. Now you can copy paste this code anywhere. In your Chat, Forums even you can rename Folders with sinhala or tamil letters. Try that.
Here Few tips for Typing Sinhala letters using Unicode

dha      ද                                   tha      ත                  
k         ක්                                  ka       ක
kae     කෑ                                 ki        කි
kii        කී                                 ko       කො
koe    කෝ                               koo     කූ
kri       ක්‍රි

Type anything and paste them anywhere as you wish.

Hope you will enjoy this. Ask anything in comment section. Share this with your friends. I don't know tamil very well. so please share tamil letter combinations with us in comment section. You can subscribe us via Our facebook twitter or Rss for latest PC tricks tips and tools.

How to change CD/DVD and pen drive Icons


This picture shows the basic removable icons. they are the defaults. But you have seen that CDs And DVDs have customized icons. Some body might know this. but most of others don't know how to do this. We can change CD, DVD, Pendrive and other removable media icons easily. we can use your custom icons also. You can edit registry and change your USB drive icon. but when you carry your pen drive to another place, that icon will not appear. so you need a permanent solution for this. The only easy way to do this is Making an Autorun file. 


First you have to find or create your own icon image. you can find lots of freewares to create icon files. 34 pixels square is the best size for an icon file. Icon file must have the .ico extension.

Now copy that icon file to your Removable drive. if you are going to burn a cd or dvd, then add the .ico file to the root folder. you can right click and hide before you burn the disk. so no one will see your icon. now we have to write the auto run file. 

  • Open Notepad and start creating your Autorun file
  • Type [AutoRun] in the first line.
  • Name your drive in the second line: label=Name
  • Specify your icon location and name in the third line: ICON=your-icon-file.ico


now your notepad file will similar to this (
If you wanted to call your drive "MyPersonalData" with an icon named "usbcustomicon.ico" )


[AutoRun]
label=MyPersonalData
ICON=usbcustomicon.ico

Click File, then Save As. Change the file type to "All" and name it AUTORUN.inf
you must not save autorun file as a text file. always keep in mind to save it as All files

on some systems your ".INF" file extension may need to be capitalized in order to work. so better if you save that file as Autorun.INF

Ensure that both your autorun.inf and any .ico files are in the ROOT of your removable drive, instead of a folder, unless you have specified the correct folder for the icon in your .inf file.

This trick won't work on systems that have autorun killers or blockers.
For some removable drives you might need to unplug and plug it again to see the change. After setting up the autorun file you can Right click both Autorun.INF and *.ico file together and hide them.

Simple Hacks and virus codes to Prank your Friends


After my first article about Prank Your Friends i got more pm to post more pranks and some better stuff. first of all i must say please use comment section or chat box to give your suggestions and comments. So others will also might give their ideas and suggestions for you. Read My first Prank article from this link. try it if you havn't read it yet.


Most massages told me that they loved that post and the video embedded and they need more technical stuff than those loose pranks. Thats true. but the real fun comes when someone got pranked by a simple trick and he couldn't realize whats going on. anyways as you requested im posting real technical stuff. guess what. most of people read this are going to code their own first virus. most of them will not get caught by antivirus programs. because we don't go to windows file management or security level. and those codes are not harmful. please don't pm and ask harmful codes now :P   i know most of people will do it if i didn't mention it here.

You don't need any softwares or compilers. just use notepad and when save select file type ass "All files".


First Code

Hack your friend's keyboard and make him type "You are a fool" simultaneously:
Type :


Set wshShell = wscript.CreateObject("WScript.Shell")
do
wscript.sleep 100
wshshell.sendkeys "You are a fool."
loop

Save it as "Trickhunters.VBS" and send it.
You can replace the word You are a fool as you wish

Second Code
 
Open Notepad continually in your friend's computer:
Type :


@ECHO off
:top
START %SystemRoot%\system32\notepad.exe
GOTO top

Save it as "Trickhunters.VBS" and send it.

Third Code

Frustrate your friend by making this VBScript hit Backspace simultaneously:
Type :


MsgBox "Let's go back a few steps"
Set wshShell =wscript.CreateObject("WScript.Shell")
do
wscript.sleep 100
wshshell.sendkeys "{bs}"
loop

Save it as "Anything.VBS" and send it.
This is the best one and i enjoyed it well with friends. I pranked one of my blog writer mate.and he lost an article that he was writing more than half hours. :D got a pm with lots of bad words. lol

Fourth Code
Open Notepad, slowly type "Hello, You were hacked by Trick Hunters Thank you xD" and freak your friend out:
Type :


WScript.Sleep 180000
WScript.Sleep 10000
Set WshShell = WScript.CreateObject("WScript.Shell")
WshShell.Run "notepad"
WScript.Sleep 100
WshShell.AppActivate "Notepad"
WScript.Sleep 500
WshShell.SendKeys "Hel"
WScript.Sleep 500
WshShell.SendKeys "lo "
WScript.Sleep 500
WshShell.SendKeys ", You"
WScript.Sleep 500
WshShell.SendKeys "were"
WScript.Sleep 500
WshShell.SendKeys " hac "
WScript.Sleep 500
WshShell.SendKeys "ked "
WScript.Sleep 500
WshShell.SendKeys "by"
WScript.Sleep 500
WshShell.SendKeys " Tri"
WScript.Sleep 500
WshShell.SendKeys "ck"
WScript.Sleep 500
WshShell.SendKeys " Hun"
WScript.Sleep 500
WshShell.SendKeys "ters"
WScript.Sleep 500
WshShell.SendKeys " Thank You"
WScript.Sleep 500
WshShell.SendKeys " xD"

Save it as "TrickHunters.VBS" and send it.

Fifth Code
Toggle your friend's Caps Lock button simultaneously:
Type :


Set wshShell =wscript.CreateObject("WScript.Shell")
do
wscript.sleep 100
wshshell.sendkeys "{CAPSLOCK}"
loop

Save it as "Trickhunters.VBS" and send it.

SixthCode

Continually pop out your friend's CD Drive. If he / she has more than one, it pops out all of them!
Type :


Set oWMP = CreateObject("WMPlayer.OCX.7")
Set colCDROMs = oWMP.cdromCollection
do
if colCDROMs.Count >= 1 then
For i = 0 to colCDROMs.Count - 1
colCDROMs.Item(i).Eject
Next
For i = 0 to colCDROMs.Count - 1
colCDROMs.Item(i).Eject
Next
End If
wscript.sleep 5000
loop

Save it as "Trickhunters.VBS" and send it.
this also good for check your CD/DVD drive tray.

Seventh Code
This also awesome. it won't stop. hard to stop also
Frustrate your friend by making this VBScript hit Enter simultaneously:
Type :


Set wshShell = wscript.CreateObject("WScript.Shell")
do
wscript.sleep 100
wshshell.sendkeys "~(enter)"
loop

Save it as "Trickhunters.VBS" and send it.

Anytime you can stop these scrips by pressing ALT+CTRL+DELETE and go to task manager then select process tab and close wscripts.exe Tell a lie about this file to your friend. make him trust this file and double click it. Good luck with pranking :D

High quality picture, Click to zoom

Watch my old pranking post from here...

How to hide any Drive in Windows Vista / 7 without any software


Don't you like people use Your DVD writer? Have some important or private things in a partition? (We all have :D )  you can make protected folders with passwords. But sometimes people can notice that you hide something. specially if you are working in a shared computer. someone might ask "what you hiding there. you are not allowed to hide things in here." now what? thats why we teach you this simple trick. but no one knows it. this is a simple windows gadget to hide your partitions or CD/DVD drive. you don't have to download or install any software for this. lets see how to do it step by step with images.

High quality picture. Click on picture to view large and detailed view


Step 1

  • Click on Start and then select Run to open the run window. Alternately, you can press Windows key and R key together.
  • Type diskpart in the Run window and hit Enter key of your keyboard.

 Step 2
Now you will see Diskpart program. Now type list volume and press Enter key of your keyboard.
Now, you will see all the partition lists of your hard disk.

 
High quality picture. Click on picture to view large and detailed view
Step 3
Select the drive that you want to hide. Just select that partition's volume number and type the command select volume [Volume_No] to select that partition and hit Enter key to execute that command.

Note: Volume_No is the number of that partition which you will want to hide.

For example, we want to hide volume 0, which drive letter is F. So, to select that partition, we have to write the following command and hit Enter key:
select volume 0

High quality picture. Click on picture to view large and detailed view
Step 4
Now, type the following command:
remove letter F
And then press Enter key of your keyboard.


High quality picture. Click on picture to view large and detailed view
see no DVD writer. if some one ask you to check his cd for viruses or to write one DVD for him, Just say omg this writer not working anymore xD. there is no worries about others who check your pc.  they cant get any clue about hidden drives as you can see above picture. You can lock your D, E or any partition in this way.


By following the above steps, you can easily hide any partition from your computer. Sometimes, after hiding your partition you may need to restart your computer. If you don't see the effect, then restart your computer and after restart you will see the desired partition is no longer in public i.e. it's a hidden partition now.

 Steps to Unlock the Hidden Drive in Windows 7 / Vista

High quality picture. Click on picture to view large and detailed view
In the previous steps, I tell you how to hide any drive on Windows 7 / Vista easily without using any software. Hope, you successfully hide your desired drive.
Now, I want to discuss the unlocking methods of those hidden drive when you wish to unlock that hidden drive.
To show your hidden drive again, at first follow the steps 1 and 2 and then type the following command:
assign letter = F
and hit Enter key of your keyboard.

Facebook Emoticons and Key Inputs Collection - Part 2


Read Facebook Emoticons and Key Inputs Collection - Part 1

ok here im going to give you other facebook emoticon and icon lists. Get Basic emoticons and the missing ones from my old post.


Special face:
Chess black :
♚ ♛ ♜ ♝ ♞ ♟
Chess White:
♔ ♕ ♖ ♗ ♘ ♙
Crosses
☩ ☨ ☦ ✙ ✚ ✛ ✜ ✝ ✞ ✠
Flowers
❀ ✿ ❁ ✾
Butterfly symbol:

Ƹ̴Ӂ̴Ʒ
Butterfly style 02:

εїз
Music facebook symbols
♪ ♫ ♩ ♬ ♭ ♮ ♯
Poker black:
♥ ♦ ♣ ♠
Poker White:
♡ ♢ ♤ ♧
Moon symbols:
☾ ☽
Sun symbols:
☼ ☀
Cloud and umbrella:
☁ ☂
Snowman:
Comet:
Stars and snowflake facebook symbols:
╰☆╮✡ ۞ ★ ☆ ⋆ ✩ ✮ ✯ ✰ ❇ ❈ ❅ ❄ ❆
Religion & belief facebook symbols
☯ ✡☨ ✞ ✝☥ ☦ ☧ ☩ ☪ ☫ ☬ ☭
Peace symbols:
✌☮
Risk radioactive and biological:
☢ ☣
Check symbol for facebook:
Hands pointing:
☚ ☛ ☜ ☝ ☞ ☟
Writing Symbols:
✉ ✍ ✎ ✏ ✐✑✒ ⌨
Scissors symbols:
✂ ✄
Phones symbols:
☎ ☏ ✆
Clocks:
⌛ ⌚
Airplane symbols:
Dinner:
Skull symbol:
Decorative symbols:
๑ ۩ ۞
Numeric facebook symbols:
①②③④⑤⑥⑦⑧⑨⑩ ⑪⑫⑬⑭⑮⑯⑰⑱⑲⑳
Letters:
ⒶⒷⒸⒹⒺⒻ ⒼⒽⒾⒿⓀⓁ ⓂⓃⓄⓅⓆⓇ ⓈⓉⓊⓋⓌⓍ ⓎⓏ
ⓐⓑⓒⓓⓔⓕ ⓖⓗⓘⓙⓚⓛ ⓜⓝⓞⓟⓠⓡ ⓢⓣⓤⓥⓦⓧⓨⓩ
Oriental symbols:
㊊㊐㊋㊌㊍㊎㊏ ㊐㊑㊒㊓㊔㊕㊖㊗ ㊀㊁㊂㊃㊄㊅㊆ ㊇㊈㊉
NEW: Chinese Symbols for facebook:
頹 - 衙 - 浳 - 浤 - 搰 - ㍭ - 煤 - 洳 - 橱 - 橱 - 煪 - ㍱ - 煱 - 둻 - 睤 - ㌹ - 楤 - ぱ - - 椹 - ぱ - ㍵ - 畱 - 煵 - 田 - つ - 煵 - 엌 - 嫠 - 쯦 - 案 - 迎 - 是 - 從 - 事 - 網 - 頁 - 設 - 計 - 簡 - 大


How To Use:

1. You can either directly copy them from here and then paste them into the section where you would like to use your chosen symbol.
2. Also, you are able to create all of these symbols by a combination of keyboard inputs. That is why they are considered to be "Alt Symbols", becasue you hold down the alt key and then press a series of numbers. Look below for a start at the input process.

Keyboard Inputs for Alt Facebook Symbols (Desktop):

1. Press and hold left Alt key on your keyboard.
2. While holding Alt key enter one of the codes below to get the corresponding facebook symbol.
3. Important note: You need to use numbers on the right side of the keyboard for entering code, not the numbers on top, otherwise they won’t work.


Keyboard Inputs for Alt Facebook Symbols (Laptop):

1. Press and hold left Alt key on your keyboard.
2. While holding Alt key also press and hold Fn key.
3. While holding Alt and Fn key enter one of the codes below to get corresponding facebook symbol.
4. Important note: You need to use numbers on the right side of the keyboard for entering code (they are usually written next to letters U, I, O… and in different color), not the numbers on top, otherwise they won’t work.

Read Facebook Emoticons and Key Inputs Collection - Part 1

Facebook Emoticons and Key Inputs Collection - Part 1

I'm sure lots of you use the well-known Facebook, and Im sure many of you are familiar with their new little chat system they have put into play. One thing they don't show, is the CODES to put smiley's in your text... so Im going to show them to you! smiles. Every ones know the basic smileys. but there are many hidden smileys also. There are many icon codes available also like <3  gives you a icon of heart. You might have seen some softwares and browser addons which has many creative and colorful icons. some of them are safe to use. but some of them collects your personal data and upload them to spammers and hackers. that is the bad part of those third party tools. Always trick hunters recommend not to use those third party tools with your browser. that why we posted our browser proxy system also. for your own safe.  
                  Here are a list of Facebook chat emoticons.This works out side from facebook also. in forums and blogs. unfortunately they are strictly for the chat only and will not create the emoticon in a wall post or other places outside of chat. But some of these are really cool, and some of them I did not know they existed! So be sure to try these out and WOW your friends with them! 

Penguin:
<(")


Shark:
(^^^)


Red and White 42:
:42:


Smiles:
:) or :-) or =) or :]


Big Smiles:
:D or :-D or =D


Closed Eyed Smiles:
>:o or >:-o


Surprise:
:o or :-o


Sad Face:
:( or :-( or =( or :[


Wink:
;) or ;-)


Crying:
:'(


Kiss:
:* or :-*


Tongue:
:p or :-p


Angry:
>:( or >:-(


Heart:
<3


Mustache/Cat Face:
:3


Pleasant Face:
^_^


Pleasant Face Eyes Down:
-_-


Angel:
O:) or O:-)


Devil:
3:) or 3:-)


Pacman:
:v


Robot:
:|]


Glasses:
8) or 8-) or B) or B-)


Sunglasses:
8| or 8-| or B| or B-|


Confused:
:/ or :-/ or :\ or :-\


Big and Small Eye:
o.O or O.o


Chris Putnam:
:putnam:


Get more characters and icons


✈♬☑ ☎ ☒ ☻ ♤ ☤☹♀ ✩✉ ✇♺✖♨ ❦☁ ✌♛ ❁☪ ☂✏♝ ❀ ☭☃☛♞ ✿ ☚ ♘✾ ☯☾☝♖✽ ✝☄☟♟✺ ☥✂ ✍♕✵ ☮☠ ❤☆ ★ ♫ ✔ ► Ω ッ ● ♣ ♪ ☼ ◄ ❥ ♂♀ ♪◘♠☻♣ ♦☺○ ¿ ❤ ☆ ★ 

Alt Code Symbol
Alt + 1
Alt + 2
Alt + 3
Alt + 4
Alt + 5
Alt + 6
Alt + 7
Alt + 8
Alt + 9
Alt + 10
Alt + 11
Alt + 12
Alt + 13
Alt + 14
Alt + 15
Alt + 16
Alt + 17
Alt + 18
Alt + 19
Alt + 20
Alt + 21 §
Alt + 22
Alt + 23
Alt + 24
Alt + 25
Alt + 26
Alt + 27
Alt + 28
Alt + 29
Alt + 30
Alt + 31

Twitter Delicious Facebook Digg Stumbleupon Favorites More